Tutorial
Cloudomation Engine is an automation-as-code platform. Automation is done via Python scripts that define the automation logic. The home of these scripts, and therefore your most important resource in Engine, is the flow. You can have many flows, each of them containing different flow scripts that do various things.
Running a flow executes its flows script. When you run a flow you create an execution. You can run a flow many times, each time creating a separate instance of an execution.
Let's now take a look at the UI and start creating flows.
To complete the examples below, you need to have an active Engine account and be signed in to try it out. Get in touch at info@cloudomation.com to request a trial account.
If you're new to Engine, the first thing you need to do is sign in. Enter your username and password. If you've activated the 2FA authentication you also need to enter your 2FA code. Once you're signed in you're ready to create your first flow.
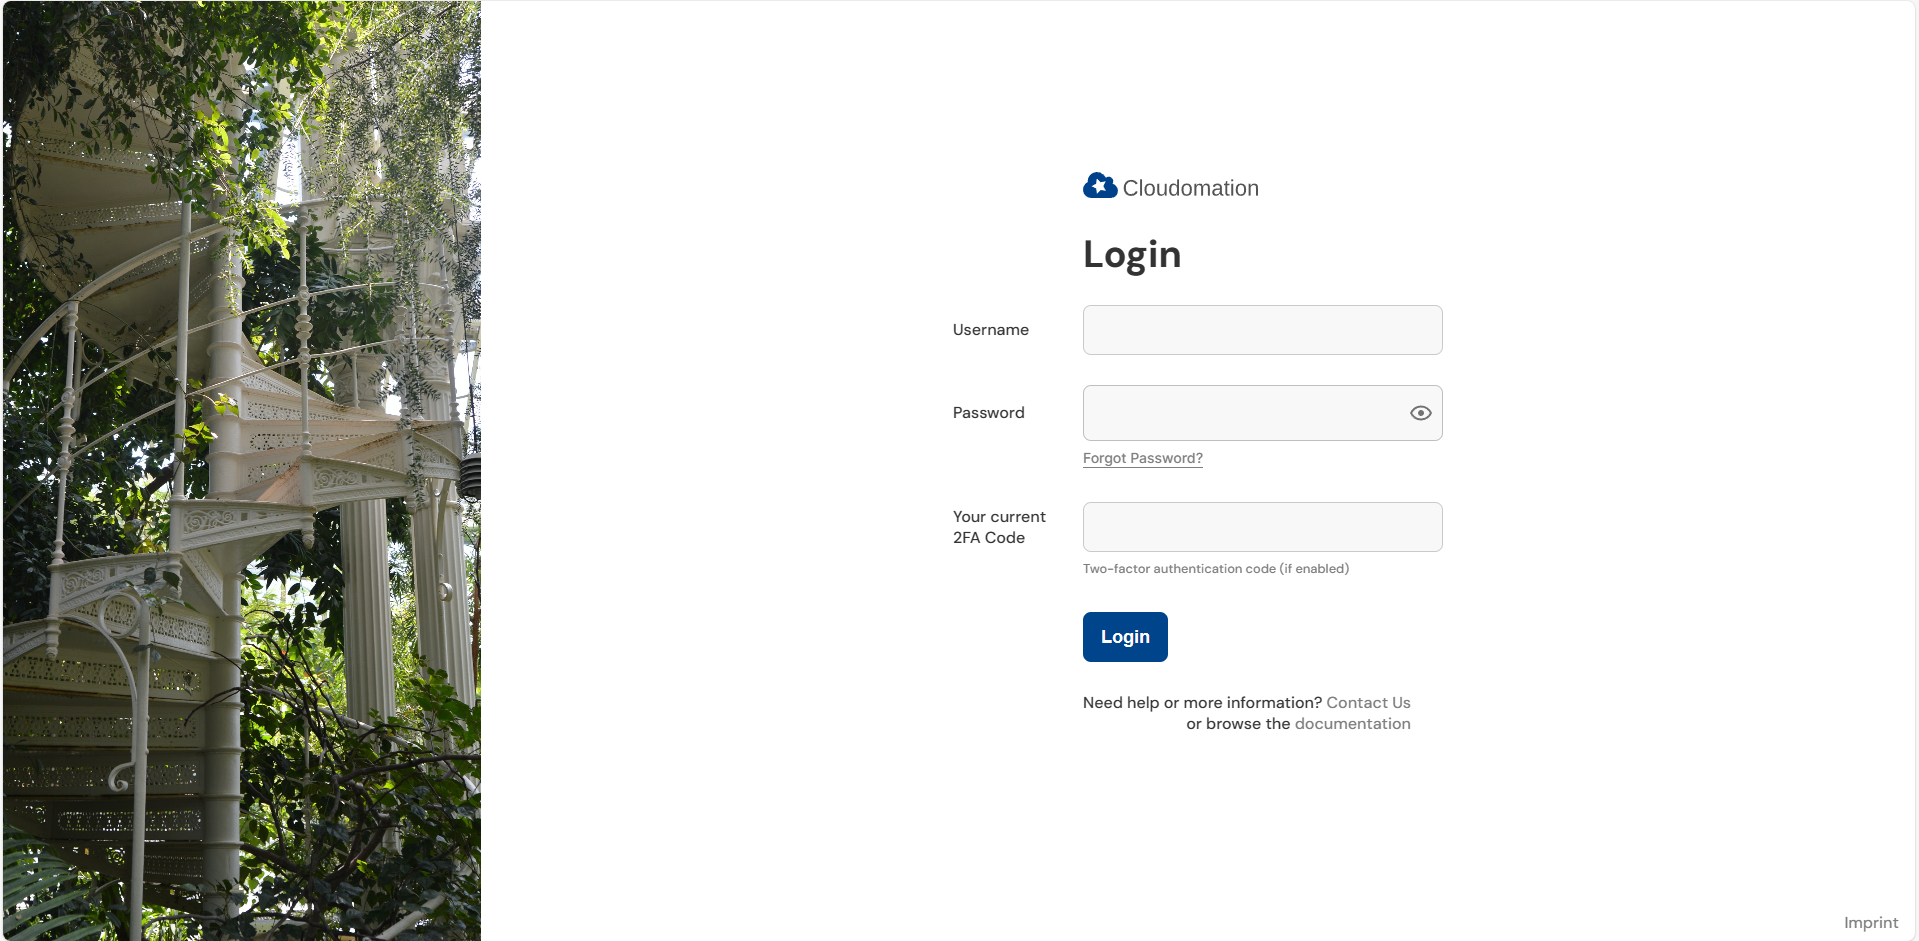
The login screen
Hello World
To quickly get started let's write a simple flow. The end of the Hello World section includes a video that shows you the UI and how to create this flow step-by-step. Feel free to take a look whenever needed.
- Create a new flow by pressing the "+ Create" button and selecting "Flow"


The buttons to create a flow
-
The flow object will be opened automatically and will already contain a handler function:
def handler(system: flow_api.System, this: flow_api.Execution, inputs: dict):
    # TODO: write your automation
return this.success('all done') -
You might want to rename your flow to show its purpose. Descriptive names are very useful, once you have many flows and other resources.
-
Replace the comment
#TODO: write your automationwith a statement to print a hello world log message:def handler(system: flow_api.System, this: flow_api.Execution, inputs: dict):
this.set_output(logging='Hello World')
return this.success('all done') -
Click on "Save".
-
Click on "Run".
-
You will be redirected to the Execution View that shows the status of your newly created execution and will update with any change.
-
In the "Output" tab you'll see the log message
logging: "Hello World"
Creating the Hello World flow
"E.T. home phone" (a more comprehensive Engine tutorial)
Now that you know how to set up a basic flow it's time to get more ambitious. In this example we are going to help E.T. phone home!
E.T. is an alien botanist, trying to reunite with his long time friend Elliot on Earth. To make this important moment possible there are certain things that need to be taken care of.
- First, they need to choose a date for the reunion. E.T. has to prepare his spacecraft first. Once he's ready, he'll notify Elliot so he can start planning the date.
- Second, they need to make sure that in case of an imminent geomagnetic storm that could endanger landing, E.T. shields his spacecraft adequately.
- Finally, they want to schedule a reunion to take place yearly.
Luckily, Elliot is an Engine user. He can set up a workflow that E.T. can trigger, even though E.T. himself is not an Engine user.
Let's go through Elliot's plan. You can follow along and build the workflow yourself (there are step-by-step guides throughout this tutorial that help with that). For each feature there is a documentation page linked so you can get more information on it. If you are curious about what you will learn feel free to take a peek at the recap at the end.
Choosing the date
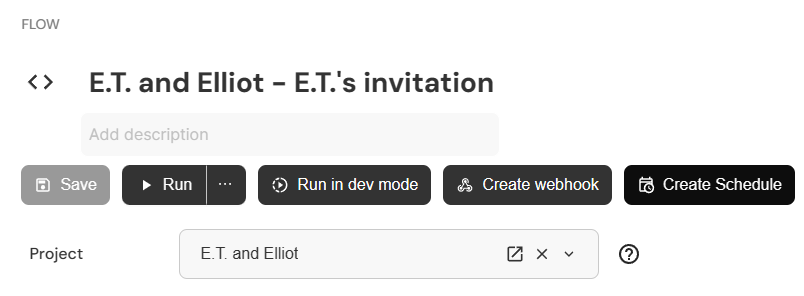
Flow: E.T.'s invitation
Elliot wants to create a flow just in the same way as you have learned in the Hello World example. This flow, once started, will ask Elliot about his choice for the date of the reunion and then save the date in a setting. To make the input of the date simple and pretty Elliot decides to use a form in his flow script.
He creates a new flow and writes a flow script that defines this form:
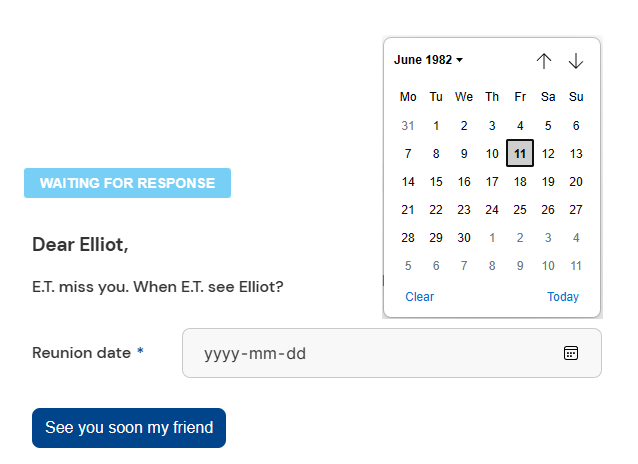
E.T.'s message to Elliot. Excuse his English, he hasn't had anyone to practice with lately
Elliot could use a predefined form but he has been using Engine for a while and knows how to customize forms. He enjoys using special elements like a date picker.
Project: E.T. and Elliot
Before he proceeds, he realizes that it might be a good idea to organize the flows and other resources he needs so he can see all of them in the one place. He creates a new project called E.T. and Elliot and changes the project of the flow.

Elliot navigates to the flow and chooses the project from the dropdown
Webhook: send E.T.'s invitation
The flow is ready and Elliot can save the reunion date. Now he just has to make sure that E.T. (who is not an Engine user) can trigger the workflow from outside the system (Engine, not the solar system).
He creates a new webhook that provides a URL for starting the flow. He makes sure that the webhook is enabled and that no login token is required (since E.T. cannot log into Engine).
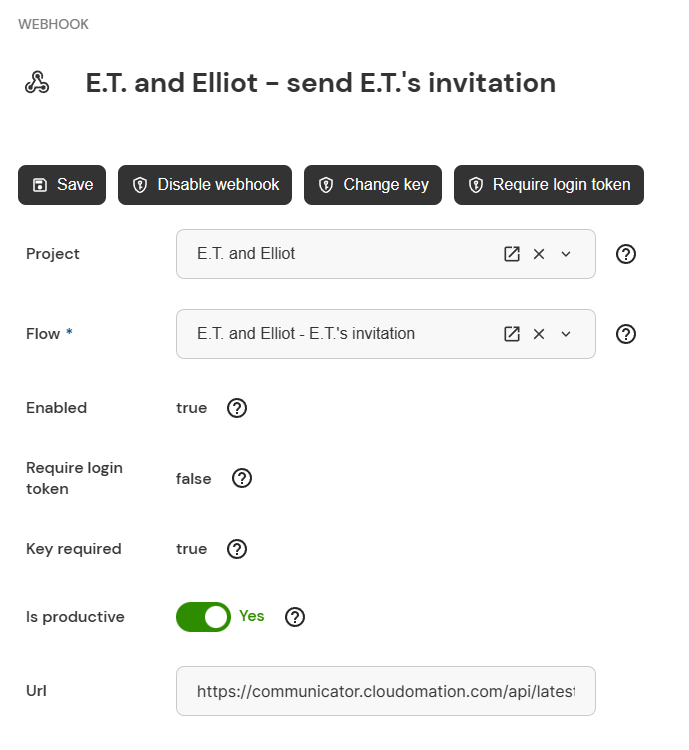
Elliot set the webhook key to 'asecurekey' ��– your key should definitely be more secure than that
Your URL will reflect the name of your host
Now that the first part is done, E.T. can trigger the workflow via calling the URL. This represents a webhook call that triggers the flow defined in the webhook. Elliot will see when E.T. is ready and can decide on a date.
Since Elliot set a key for the webhook, E.T. needs to call the URL like this: https://communicator.cloudomation.com/api/latest/webhook/webhook-name/call?key=asecurekey
Preparing for geomagnetic storms
That was a lot! But Elliot is not done. Now he wants to make sure that E.T. can safely land his spacecraft on the chosen date.
Connector: NASA API
After some research he finds that NASA provides a REST API that does exactly what he needs. He decides to get the needed information by creating a new connector that communicates with NASA's API and returns the time and date of geomagnetic storms.
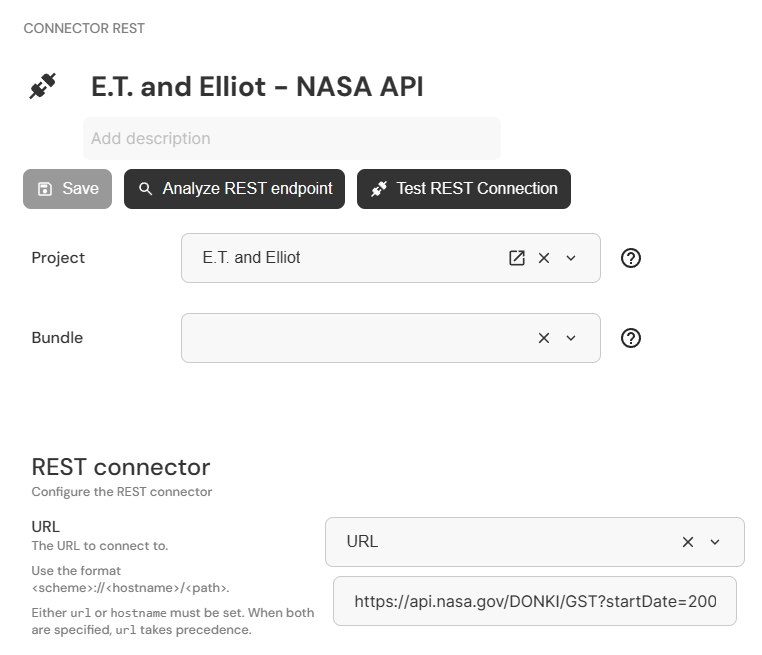
Elliot sets up the connector using the API endpoint from NASA
The startDate and endDate are hardcoded in this example. Elliot could also dynamically set them later in the flow. The DONKI/GST API is provided by NASA. You can find more APIs from NASA here.
Flow: Elliot's response
Now Elliot is thinking about how E.T. should get the reunion date and a warning in case of a geomagnetic storms. He decides to set up a new flow that uses the connector to NASA's API and gets the reunion date from the setting (after the flow 'E.T. and Elliot - E.T.'s invitation' saved it into the setting). He sees 3 possibilities that the flow must handle:
- There is a date and the skies are clear
- There is a date and on that date there is an imminent storm
- Elliot has not yet chosen a date
Additionally, he wants to make sure that a temporary outage of the NASA API doesn't halt the process. He could think of ways to do this on his own but he also knows that Engine provides freely downloadable bundles of extra content. The wrapper bundle has just the tool that he needs.
He uses the retry wrapper to send follow-up calls to the API if it doesn't respond initially.
The retry wrapper is part of the wrapper bundle. Elliot installed this bundle when he set up his Engine workspace. See here how he did it.
Webhook: get Elliot's response
Elliot's flow returns a webhook response. Elliot sets up a new webhook (in a similar manner to the first webhook) so E.T. can call the URL provided and see the status of the invitation (the returned webhook response) at all times.
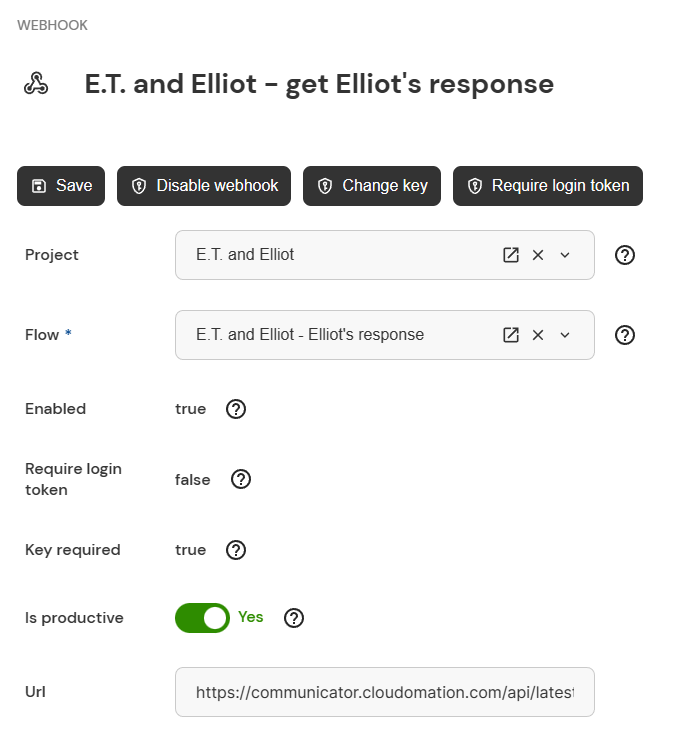
Elliot sets up a second webhook – the key is again 'asecurekey'
Now the workflow is set up and neatly organized in a project. E.T. can trigger the invitation and get Elliot's response without ever logging into Engine.
Scheduling a yearly reunion
Elliot is happy with what he's accomplished and cannot wait to see his friend again. He knows that keeping in touch with old friends is important and takes effort. He wants future reunions to take place yearly so he sets up a new schedule that triggers the reunion workflow once every summer.
Schedule: Yearly reunion
He decides to install the scheduling bundle (the same way he installed the wrapper bundle) and use the scheduler that comes with it.
Elliot navigates to the flow that starts the workflow and uses the plugin action 'Create Schedule'
You might have noticed that there is a new button in the flow that says 'Create Schedule'. The scheduling bundle that Elliot has just installed uses a plugin that provides the 'Create Schedule' button. You can also create your own plugins for your needs.
The scheduler guides Elliot through the setup with a form. There are other ways he could set up a schedule but for now he sticks with this easy and fast solution.
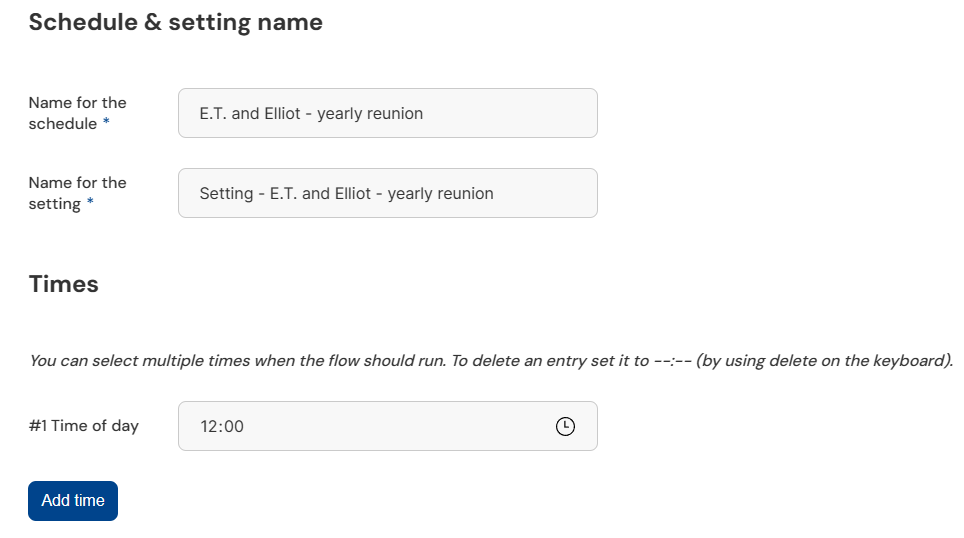
First, Elliot sets the name and time of the schedule
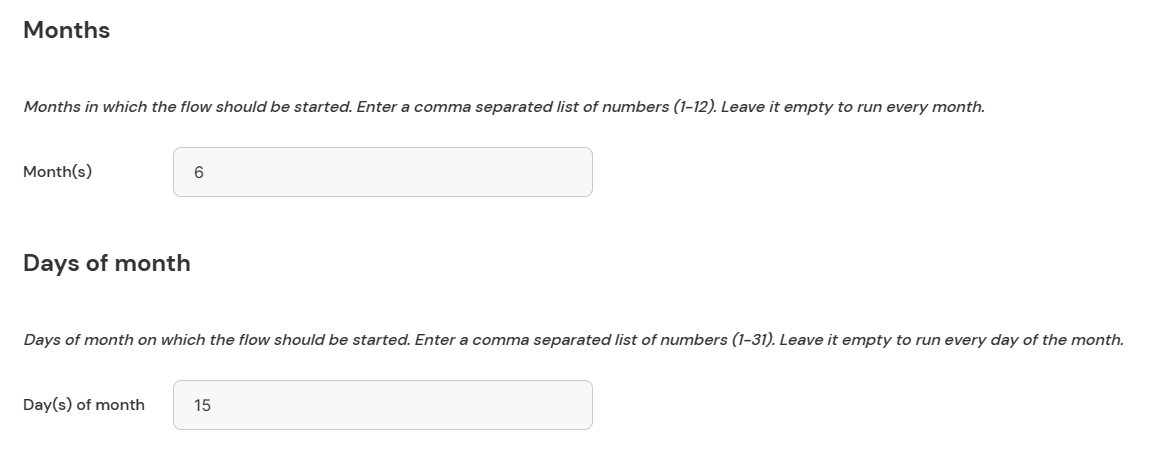
Then, he decides that the workflow should be started on June 15th each year
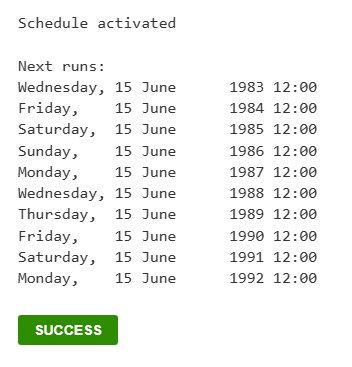
Finally, he starts the schedule and gets feedback on the next workflow runs
Congratulations to Elliot! The workflow is set up and can be started by E.T. What's more: from next year on the workflow will be automatically started yearly thanks to the schedule.
Elliot finally sits back and waits eagerly for E.T. to trigger the invitation. He smiles. This is going to be a day to be remembered.
Return to reality...
Now that the journey is over, let us recap what you have learned. Engine is a powerful tool that helps you create workflows, communicate across different systems, automate your processes and interact with users. You can even allow users to be part of a workflow without them ever logging into Engine.
You can already achieve great things with just the resources used in this tutorial. And there is so much more that Engine can do! This journey might be over but there is nothing stopping you from starting a new journey with Engine.
Feel free to take another look below at the resources used in our tutorial. If you have any questions you can always reach us at info@cloudomation.com.